Trading your DSLR for a smartphone on your UK trip isn’t a downgrade; it’s a strategic switch to a different, powerful photographic system.
- Mastering the lens-switching strategy is crucial for capturing context, from London’s architecture to environmental portraits.
- Use RAW mode to preserve the UK’s unique atmospheric moods—like misty Scottish lochs or dramatic coastal skies—that AI processing often erases.
Recommendation: Stop thinking “phone vs. camera” and start asking “which specific lens and mode is right for this exact shot?”
Every travel photographer knows the feeling. You’re exploring the cobbled streets of Edinburgh or hiking the Cornish coast, and the familiar ache in your shoulder from a heavy camera bag starts to set in. You see others capturing beautiful moments with just their phones, and the tempting thought crosses your mind: could I leave my bulky DSLR at home next time?
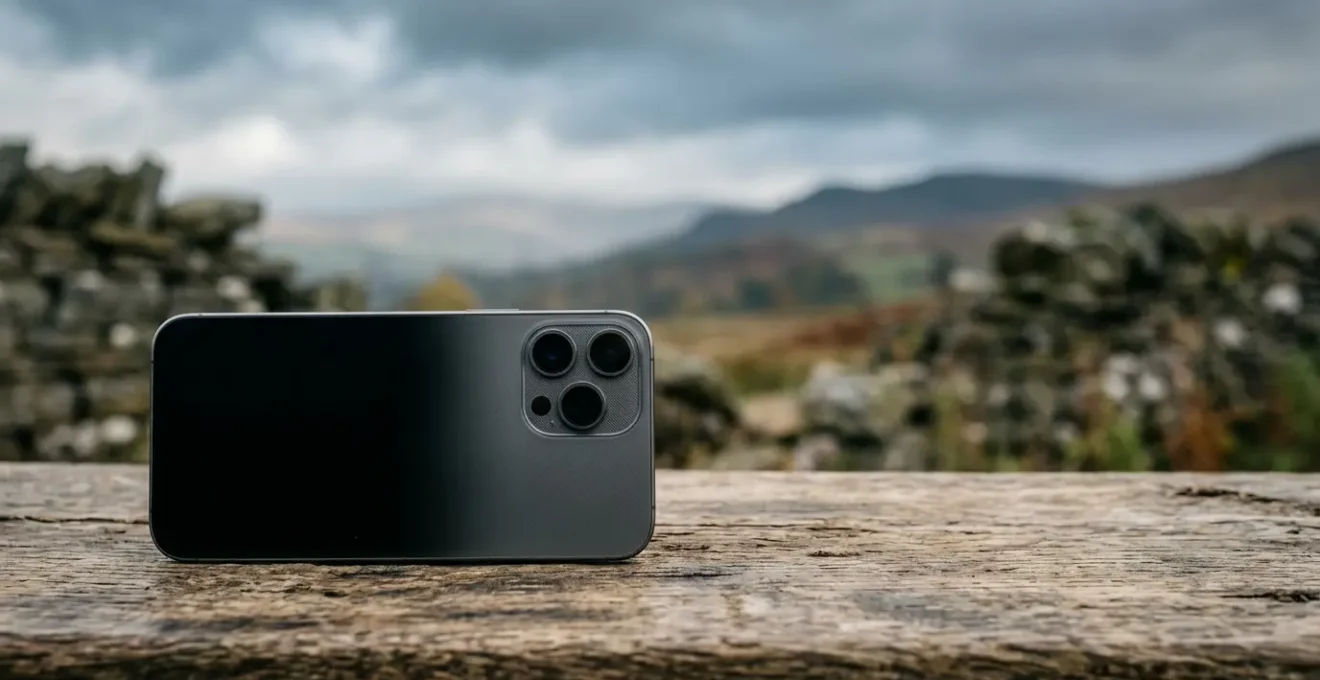
The standard advice is a tired cliché: smartphones are for convenience, and “real” cameras are for quality. But that’s an outdated view. Modern flagship phones are not single cameras; they are sophisticated photographic systems with multiple lenses, powerful manual controls, and the ability to shoot in RAW. The line hasn’t just been blurred; it has been completely redrawn by computational photography.
The question is no longer “is a phone good enough?”. The real question, for a thoughtful photographer, is “How do I master this new system to create compelling images?” The key is to move beyond the mindset of a single camera and lens and learn the unique “computational grammar” of your phone. It’s about knowing when to trust the AI and when to take full manual control to preserve the atmospheric integrity of a scene.
This guide isn’t another simple phone vs. camera debate. It’s a strategic manual for the hobbyist photographer ready to travel lighter without sacrificing creative intent. We’ll explore how to make deliberate choices—from selecting the right lens for London’s architecture to capturing star trails over a Welsh national park—to make your smartphone your most powerful tool for UK travel photography.
This article provides a detailed roadmap for mastering your phone’s camera system. Below is a summary of the specific techniques and strategies we will cover to help you get the most out of your device on your next UK adventure.
Summary: Can a Multi-Lens Smartphone Replace Your DSLR for UK Travel?
- When to Switch to the 3x Telephoto Lens for Flattering Portraits?
- Why Do 12MP Photos Look Better Than 108MP on Budget Phones?
- The Lighting Mistake That Ruins 50% of Sunset Photos
- Ultrawide or Telephoto: Which Lens Is Essential for London Architecture?
- How to Align External Filters With a Triple-Camera Setup?
- Night Mode or Manual Exposure: Which Captures Better Star Trails?
- Optical or Hybrid: What Does “Space Zoom” Actually Mean?
- RAW vs AI Processing: Which Mode Should You Use for Holiday Snaps?
When to Switch to the 3x Telephoto Lens for Flattering Portraits?
One of the first mental shifts to make when moving from a DSLR to a smartphone is to stop “pinching to zoom” and start consciously “switching lenses.” Your phone’s 3x or 5x setting isn’t just for getting closer; it’s a distinct telephoto lens with unique properties, perfect for portraits. Unlike the standard wide lens which can distort facial features at close range (the dreaded “big nose” effect), a telephoto lens provides natural compression.
This compression flattens the perspective, making facial features appear more proportional and flattering. It also enhances the separation between your subject and the background, creating a more pleasing and professional-looking blur, often called bokeh. This is ideal for environmental portraits where you want to include the context of your location—like a subject set against the backdrop of Edinburgh’s historic townhouses or the white cliffs of Dover—without the background being distracting.
Case Study: Achieving Superior Portraits with Telephoto Compression
As demonstrated by professional photographers, using a telephoto lens with an equivalent focal length of around 58mm or more is a classic technique for superior portraits. By maintaining a distance from your subject and using the telephoto lens, you achieve beautiful natural compression and subject isolation. This technique, as highlighted in a detailed analysis on the superiority of telephoto for portraits, helps create soft backgrounds and near hyper-realistic scenes, perfectly integrating your subject into the UK travel environment.
However, remember that telephoto lenses on phones typically have smaller apertures (e.g., f/2.8) than the main lens. This means they let in less light, so ensuring your subject is well-lit is critical for a sharp, noise-free image. For best results, position your subject with a distant background to maximize the compression effect and brace your phone or use a small tripod, as any shake is magnified at higher focal lengths.
Why Do 12MP Photos Look Better Than 108MP on Budget Phones?
The “megapixel race” is one of the most misleading marketing tactics in the smartphone world. You might assume a 108MP or 200MP camera is inherently superior to a 12MP one, but often the opposite is true, especially on budget-to-mid-range phones and in challenging light. The reason is down to a simple law of physics: the size of the pixels, not just the number of them. A 12MP photo often looks better because its sensor uses larger individual pixels, which can gather more light.
High-megapixel sensors cram tiny pixels onto a small surface. To compensate, they use a process called pixel binning, where groups of small pixels (e.g., 9 or 16) are digitally combined to act as one large “super pixel.” In theory, this provides the best of both worlds—high detail in bright light and better light-gathering in the dark. In practice, especially on phones without top-tier processors, the resulting 12MP binned image is often sharper, has less noise, and better dynamic range than a full-resolution 108MP shot.
Think of pixels as buckets collecting rain (light). A few large buckets will collect more rain more efficiently than many tiny thimbles. This is why a dedicated camera with a large sensor and “only” 24MP can wipe the floor with a 200MP smartphone in low light. The file sizes are also a practical concern, as a 200MP image can be 10-20 times larger than a standard one, quickly filling your storage on a long trip. Unless you plan on making a wall-sized print, stick to the default binned resolution; your phone’s engineers have optimized it for the best balance of quality and performance.
The Lighting Mistake That Ruins 50% of Sunset Photos
You’ve found the perfect spot to watch the sun dip below the horizon over the Lake District. The sky is ablaze with colour. You pull out your phone, snap a picture, and the result is disappointing: the vibrant colours are washed out, and the sky is an overexposed, bright white blob. This is the single most common mistake in sunset photography—letting the camera’s automatic mode overexpose the scene.
Smartphone cameras are programmed to achieve a balanced exposure across the entire frame. When faced with a very bright area (the sun and sky) and a very dark area (the landscape), the camera tries to find a middle ground, which often means brightening the shadows. In doing so, it “blows out” the highlights, losing all the colour and detail in the most beautiful part of your photo. The key to a dramatic sunset shot is to take control and deliberately underexpose.
The fix is incredibly simple and known as the “tap-and-slide” technique.
- Set Your Exposure Point: Tap on the brightest part of the sky on your screen (not the sun itself, but near it). This tells the camera to prioritize the exposure for the highlights.
- Adjust Exposure Manually: After tapping, a sun icon or slider will appear. Slide your finger down (or left on some phones) to decrease the exposure. You will see the colours in the sky instantly become richer and deeper.
- Embrace the Silhouette: As you darken the sky, the foreground landscape or cityscape will turn into a dark, dramatic silhouette. This contrast is what makes the image powerful.
- Lock Your Settings: Once you have the exposure you want, long-press on the focus point to activate the AE/AF (Auto Exposure/Auto Focus) lock. This prevents the camera from changing your settings, even if you move the phone to recompose the shot.
This simple manual override is the difference between a bland snapshot and a breathtaking keeper.
Ultrawide or Telephoto: Which Lens Is Essential for London Architecture?
Photographing architecture in a dense city like London presents a unique challenge: you’re often too close to the buildings to fit them in the frame, or you want to isolate details from a distance. Your smartphone’s multi-lens system is perfectly designed to solve this, but you need a clear strategy for when to use the ultrawide (0.5x/0.6x) versus the telephoto (3x/5x) lens. The answer isn’t one or the other; they are both essential for different creative goals.
The ultrawide lens is for capturing immersion and scale. When you’re standing in a narrow lane or at the base of a towering structure like The Shard, the ultrawide is the only way to convey the grandeur and spatial context of your surroundings. It pulls the viewer into the scene. However, its major drawback is perspective distortion; vertical lines at the edge of the frame will appear to bend inwards. You can minimize this by keeping your phone perfectly level, but it’s an inherent characteristic of the lens.
The telephoto lens is for capturing compression and detail. It allows you to stand back and “flatten” a scene, making distant objects appear closer together. This is perfect for shooting from a vantage point like Greenwich Park to compress the London skyline or for isolating specific architectural details on the Houses of Parliament without any perspective distortion. Its limitation is that it requires more distance to work with and needs good light due to its smaller aperture.
This table breaks down the strategic choice between your phone’s primary lenses for different architectural shots in London, based on a clear analysis of mobile photography lens usage.
| Lens Type | Best Use Case | Focal Length | London Example | Key Advantage | Main Limitation |
|---|---|---|---|---|---|
| Ultrawide (0.5x) | Immersion and scale | 13-16mm equivalent | Standing at base of The Shard, capturing sweep of Regent Street, Leadenhall Market interiors | Captures grand scale and spatial context in narrow lanes | Significant perspective distortion at edges; keep phone level to minimize |
| Telephoto (3x) | Compression and detail | 70-80mm equivalent | Shooting from Greenwich Park to flatten skyline, isolating details on Houses of Parliament | Natural subject isolation, minimal distortion, flattering compression | Requires more working distance; smaller aperture needs good light |
| Main Wide (1x) | General versatility | 24-28mm equivalent | Everyday street scenes, balanced compositions | Best overall image quality, largest sensor, good low-light performance | Less dramatic perspective than ultrawide or telephoto options |
How to Align External Filters With a Triple-Camera Setup?
As you get more serious about smartphone photography, you’ll want to experiment with external filters, like a Circular Polarizer (CPL) to cut reflections or a Neutral Density (ND) filter for long exposures in daylight. This is where you can run into a major frustration with modern multi-lens phones: you line up your filter perfectly over the main lens, but the phone’s software decides to “intelligently” switch to the telephoto or ultrawide lens, ruining the shot. This is a classic case of the phone’s helpful AI getting in the way of creative intent.
The solution is to wrestle back control by using your camera’s “Pro” or “Manual” mode. This mode is your best friend when using accessories. It allows you to override the automatic lens-switching behaviour and lock the phone onto the specific lens you want to use. The process is straightforward and is the only reliable way to use filters.
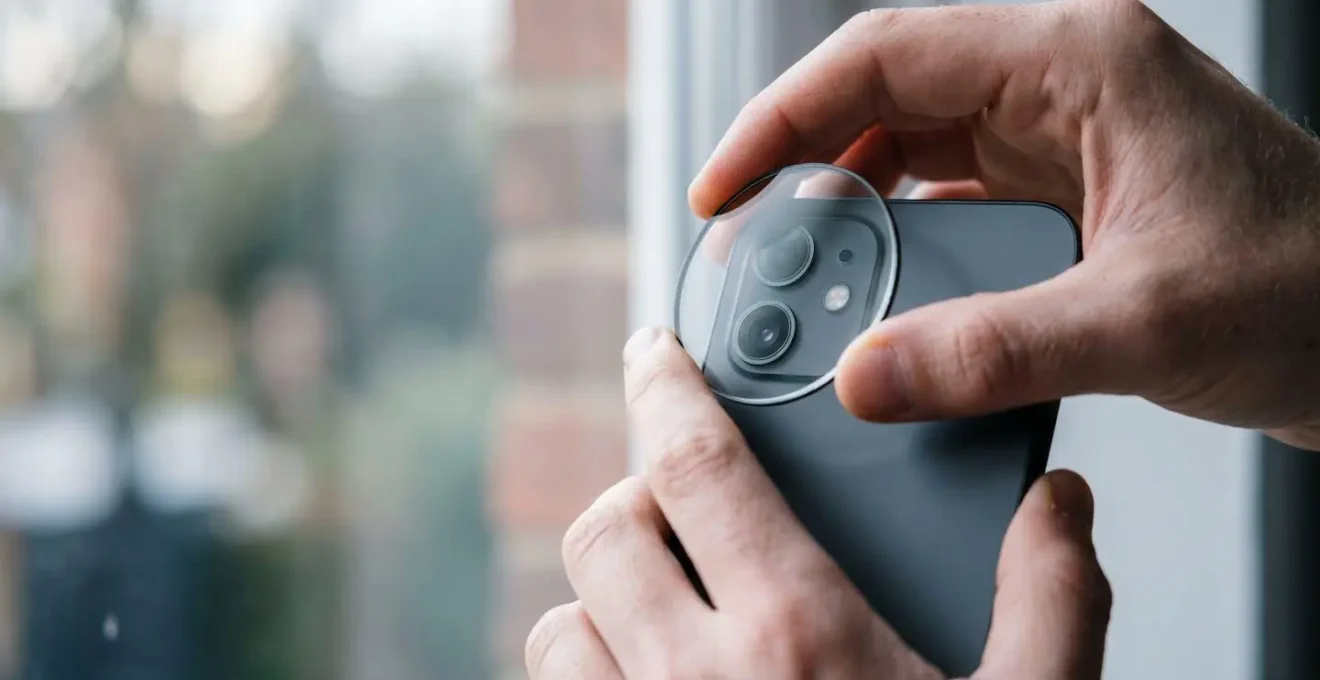
Before you even attach the filter, open your camera app and switch to Pro/Expert mode. Here, you’ll find an option to manually select the 0.5x, 1x, or 3x lens. Once you have locked in your chosen lens, the phone is prevented from auto-switching. Only then should you physically attach your filter clip or mount, carefully aligning it over the selected, active lens. Always take a quick test shot to check for vignetting (dark corners), which indicates the filter isn’t perfectly centred.
Your Action Plan: Using Filters in Pro Mode
- Open your camera app and navigate to Pro/Expert/Manual mode before attaching any filter.
- Manually select the exact lens you intend to use (e.g., 1x main, 3x telephoto), which prevents auto-switching.
- Attach your filter clip or mount, aligning it with the physically selected lens on the phone.
- Confirm your lens selection is locked in Pro Mode to prevent any software overrides during capture.
- Take a test shot to check for vignetting or misalignment at the edges, which means the filter isn’t centered properly.
Night Mode or Manual Exposure: Which Captures Better Star Trails?
Capturing the magic of a starry sky is a rite of passage for any travel photographer. With increasingly light-polluted skies, a trip to one of the UK’s designated dark sky areas presents a golden opportunity. In fact, the UK is home to six designated International Dark Sky Reserves, including Snowdonia and the Brecon Beacons in Wales, making it a prime destination for astrophotography. A common question is whether to use the phone’s “Night Mode” or go full manual. For star trails, the answer is unequivocal: Manual Mode is the only way.
Night Mode is a computational marvel for static night scenes. It works by taking multiple shots over a few seconds (typically 2-4) and merging them to reduce noise and brighten the image. This is fantastic for a handheld shot of a city at night, but it’s completely useless for capturing the long, graceful arcs of star trails. Star trail photography requires a series of very long, consecutive exposures—something Night Mode is not designed for.
To capture star trails, you need to follow a specific workflow in your phone’s Pro/Manual mode. First and foremost, a stable tripod is non-negotiable; any movement will ruin the shot. Set your focus manually to infinity (often represented by a mountain icon). Then, set your ISO between 800-1600 and your shutter speed to the longest possible duration, usually 15 or 30 seconds. You will then capture a sequence of 50 to 200 individual shots. Each photo will capture the stars as small dots. The final magic happens in post-production, where you “stack” these individual images using software like StarStaX (desktop) or a mobile app like LaPixa, which merges them to reveal the trail of the stars’ movement across the sky.
Optical or Hybrid: What Does “Space Zoom” Actually Mean?
Smartphone marketing is filled with bombastic terms, and “Space Zoom” is a prime example. When a phone advertises 30x, 50x, or even 100x “Space Zoom,” it’s crucial to understand what you’re actually getting. It is not pure optical zoom. “Space Zoom” is a marketing term for a hybrid zoom system that combines a true optical telephoto lens with aggressive digital zoom and AI-powered image processing.
Here’s the breakdown. Your phone has a specific optical zoom limit, for example, a 3x or 5x telephoto lens. Up to that point, you are getting genuine optical quality, where the image is magnified by the glass lens itself. Anything beyond that optical limit is where hybrid zoom takes over. The phone is essentially taking the image from its farthest optical lens and then digitally cropping and enlarging it, using AI algorithms to try and “reconstruct” the missing detail. The farther you push the zoom, the more the image relies on this digital guesswork.
Case Study: The Practical Limits of Hybrid Zoom
Professional camera phone tests consistently show a sharp drop-off in quality beyond the native optical range. For instance, while a phone might take sharp images at its 4x or 8x optical limit, pushing it to 10x or 30x hybrid zoom results in a soft, painterly image that lacks fine detail. As one in-depth analysis of camera phones concludes, this demonstrates that while optical zoom maintains quality, hybrid ‘Space Zoom’ degrades it significantly.
So, is it useless? Not entirely, if you reframe its purpose. As a technical analysis notes, “Space Zoom is best used for ‘scouting and reference’. The photo will be poor quality, but it’s a powerful visual note-taking tool.” Think of it as a pair of digital binoculars. You can use the 50x zoom to identify a distant landmark, read a sign, or scout a composition from afar. You then walk closer and use the high-quality optical lens to take the actual photo. It’s a tool for seeing, not for creating a final image.
Key Takeaways
- A phone isn’t one camera, it’s a system of 3+ lenses. Master the art of consciously switching between ultrawide, wide, and telephoto for specific creative outcomes.
- AI processing (JPEG/HEIC) is for convenience; RAW is for preserving atmosphere and full creative control. A dual RAW+JPEG workflow is the ultimate travel strategy.
- Technical limitations, like poor-quality “Space Zoom,” can become powerful tools if used intentionally—for example, as a digital scouting scope rather than for a final photo.
RAW vs AI Processing: Which Mode Should You Use for Holiday Snaps?
This is perhaps the most important strategic decision you’ll make as a smartphone photographer. Should you shoot in the standard mode (JPEG/HEIC) and let the phone’s AI work its magic, or should you switch to Pro mode and capture RAW files? The answer depends entirely on your intention for the photo. For a successful UK travel shoot, the best approach is a “dual workflow”: using both modes for different situations.
The standard AI-processed image is your perfect “holiday snap.” It’s designed for instant gratification. The AI brightens shadows, boosts colours, and sharpens details to create a universally pleasant and immediately shareable photo. This is perfect for photos of your food in a pub, selfies with friends, and general everyday moments. However, this same processing can ruin photos where the mood is the subject. It might “correct” the dramatic grey skies over the Cornish coast into a bland blue or eliminate the beautiful, moody fog of a Loch Lomond morning.
This is where RAW comes in. A RAW file (like Apple’s ProRAW or Samsung’s Expert RAW) is the digital equivalent of a film negative. It captures all the data from the sensor without any destructive AI processing. This gives you complete control in an editing app like Adobe Lightroom. As The Blonde Abroad’s photography guide notes, “Once you import the photo into Lightroom, you’ll have more control over your edits, and your pics will look sharper and more vibrant.” Shooting RAW allows you to preserve the authentic atmosphere and edit the photo to match your memory of the scene, not the AI’s interpretation. The trade-off is larger file sizes and the necessity of editing.
Adopting a dual workflow is the key. Use the default AI for casual snaps and switch to RAW for your “portfolio shots”—the epic landscapes, unique architectural details, and atmospheric moments that you want to craft carefully. This table shows how this strategy applies to UK travel, drawing from proven travel photography tips.
| Shooting Mode | Best Use Case | UK Travel Example | Key Advantage | Main Limitation | File Size |
|---|---|---|---|---|---|
| AI/JPEG/HEIC (Standard) | Quick, shareable ‘holiday snaps’ | Photos of food in a pub, selfies with friends, everyday moments | Instant results, optimized for social sharing, universally pleasant bright images | Can ‘ruin’ atmospheric moods like foggy Scottish Highlands or dramatic grey skies over Cornish cliffs | Small (2-5MB typical) |
| RAW (ProRAW/Expert RAW) | ‘Portfolio shots’ requiring careful editing | Epic landscapes, moody Loch Lomond mornings, atmospheric moments, unique architectural details | Captures complete data, preserves authentic atmosphere, full control over mood in post-production | Requires editing skills and time, larger files, not immediately shareable | Large (25-50MB typical) |
| Dual Workflow (Both) | Comprehensive travel documentation | Shoot RAW+JPEG simultaneously for important scenes | Instant preview with JPEG, full editing flexibility with RAW backup | Doubles storage requirements, requires workflow discipline | Combined size |
Action Plan: Your UK Travel Shot Strategy
- Identify Your Goals: Where will these photos live? (e.g., Instagram grid, personal prints, family album). This defines the required quality.
- Scout the Scene: Assess the light, subject, and mood. Is it a fleeting moment (best for AI/JPEG) or an epic landscape (best for RAW)?
- Match Mode to Mood: Does the default AI processing preserve the authentic atmosphere (e.g., misty Highlands) or destroy it? Choose RAW to protect the mood.
- Evaluate ‘Portfolio Potential’: Is this a potential “hero” shot of your trip? If yes, shoot in RAW to give yourself maximum editing flexibility later.
- Define Your Workflow: Decide your strategy. Will you shoot RAW+JPEG for key scenes? Do you have time and apps (e.g., Lightroom Mobile) to edit RAW files on the go?
By moving beyond the automatic settings and making these conscious, strategic choices, you truly begin to use your smartphone not as a simple camera, but as the powerful, versatile photographic system it has become. Start today by applying these techniques to transform your travel photography.